Showing posts with label Spellbinders. Show all posts

09 December 2024

2024: Stitched Reindeer Stocking using Spellbinders' FELT STITCH & CREATE COLLECTION [project #003]

Hello, sweet friends! 

I'm back to share a super cute custom stocking that I made using the NEW Spellbinders Felt Stitch & Create collection, specifically the Felt Reindeer dies.
This stocking was fun and easy to create, just like my Stitched Fox Tea Towel (HERE) and my Stitched Snowman Ornament (HERE)--- I love this release! 

I followed some instructions for how to make a stocking (I will not lie--- I messed up 3x but if I had just referenced the instructions for the fuzzy top... I would have been fine! LOL!). I altered the instructions by adding a stitched felt reindeer to the front of the stocking, and then I continued with each step. #FUNFact: I used kitchen towels for my stocking fabric🙃
OPTIONS: You can use ANY of the felt stitched creations to your stockings! You could even stitch only their heads and hats if you wanted to keep it more simple! Switch out your fabric or make each stocking the same! There are lots of options for this fun project! 

That's it for me today-- but be on the lookout as I have two more projects and a few ideas for each coming with MORE stitched projects. I can't wait to share!

Be sure to stop by the Spellbinders' blog and website for their AWESOME sales!!! 

THANKS so much for stopping by! There's MORE to come 💌

Be blessed ❤️
Sav


Spellbinders Supplies- Stitched Snowman Ornament #002

07 December 2024

2024: Stitched Snowman Ornament using Spellbinders' FELT STITCH & CREATE COLLECTION [project #002]

Hello, sweet friends! 

I'm back to share a fun gift idea and ornament for the holiday season using the NEW Spellbinders Felt Stitch & Create collection, specifically the Felt Snowman Star dies
This ornament was just as easy to create as my Stitched Fox Tea Towel (HERE)--- I love this release! 

And if you know me... I wanted to "AMP" up my ornament. I wanted this ornament to have another function. I wanted this ornament to hold a gift too! 
Gift Holder Instructions: This is really easy to do--- Die cut all pieces and then add a small 1 inch x 0.5 inch strip of felt to the front of the snowman body. I tacked it down with three stitches on each side but you can do any stitch or as many stitches as you want. Now create the snowman as instructed! 

Options: You can add money, candy canes, chapstick, and MORE to this little ornament gift holder! And you can also change out the color of the mittens and hat band and stitched star to make everyone's ornament different (i.e. Travis would be blue/gray and mine would be green). The great thing about this ornament gift holder is that you can use it EVERY year--- it can become the new tradition of always getting (blank) on your ornament!! So fun!!! The possibilities are endless!!!  

That's it for me today-- but be on the lookout as I have two more projects and a few ideas for each coming with MORE stitched projects. I can't wait to share!

Be sure to stop by the Spellbinders' blog and website for their AWESOME sales!!! 

THANKS so much for stopping by! There's MORE to come 💌

Be blessed ❤️
Sav


Spellbinders Supplies- Stitched Snowman Ornament #002

06 December 2024

2024: Stitched Fox Tea Towel using Spellbinders' FELT STITCH & CREATE COLLECTION [project #001]

Hello, sweet friends! 

I'm back to share a fun gift idea for the holiday season using the NEW Spellbinders Felt Stitch & Create collection, specifically the Felt Forest Fox dies
This little tea towel was easy to put together using the fox dies and warm collection felt from Spellbinders. Just die cut and stitch onto the towel! It truly was super easy! 

I can't say enough about this felt by SB--- it cuts easily, it's the BEST felt for projects (ask me how I know!?!! LOL! I tried to use cheap stuff and it just wasn't strong!), and the colors are PERFECT!!! I love the mix of colors I used for this little fox!!!! 
The hardest part about this stitching project would be: 
  1. Finding the center of the tea towel *which I'm not sure I did correctly! LOL!
  2. The question of should I add a pom pom ribbon to the bottom of the towel *I think I will add that for flair and a pop of color!
That's it for me today-- but be on the lookout as I have two more projects and a few ideas for each coming with MORE stitched projects. I can't wait to share!

Be sure to stop by the Spellbinders' blog and website for their AWESOME sales!!! 

THANKS so much for stopping by! There's MORE to come 💌

23 November 2024

2024: August Birthday card using Spellbinders' Florals Through the Year collection [card #305]

Hello, sweet friends! 
I'm back with sharing my absolute FAVORITE Spellbinders Florals Through the Year collection creation-- it's another birthday card but with lots of dimension since I fussy cut that poppy flower out multiple times!!! Be sure to check out my other ideas for these BP plates and collection HERE!!! 
This card is my favorite because: 
  • I used my birth flower Press Plates
  • The colors are super pretty together
  • I used my FAVORITE technique- fussy cutting
Here's how I got to the dimension for this card... I pressed this image multiple times on the cardbase, and it didn't look good! LOL! My greens and reds were mixing too much. So I pressed the image again to fussy cut and add as layers. The PERFECT fix! 

I also added a bit of black accent dots to the center of each poppy to make it have more oomph... I think it was the PERFECT touch!!!

See why this is my favorite??? I love it for all of these reasons and because I was able to save it from all my mistakes:) 

That's it for me today. Be sure to stop by the Spellbinders' blog and website for their AWESOME sales!!! 

THANKS so much for stopping by! There's MORE to come 💌

2024: November Birthday card using Spellbinders' Florals Through the Year collection [card #304]

Hello, sweet friends! 
I'm back with sharing another Spellbinders Florals Through the Year collection creation-- this time I went with a birthday card design! Be sure to check out my other ideas for these BP plates and collection HERE!!! 
My second card I tried something different... I wanted to make a ONE LAYER card. I've created one layer cards before... BUT they never turn out how I want them to! LOL! I just don't do well with one layer... however, I think this card turned out 85% awesome (more on this later)! 

What I'm proud of with this card is that oval inked background!!! I didn't have any SB oval die cut images... so I made my own using the Make A Wish Arch Labels dies. All I did was partially die cut the arch, flipped it, and partially die cut it again to match where I had already die cut. So easy! And I think that inked oval background really makes this one layer card pop!!

Now here's where I messed up: I struggled with my ink blending because I thought there was one spot that needed a bit more aqua green ink... so AFTER I took off the flower mask... I inked the "white spot"... only to muddy the pink flower 🤦🏼‍♀️ I added some sequins to cover it up so it all worked out! LOL! **supplies listed below

I have one more project to share, and it's my FAVORITE!!! Be sure to come back for MORE!!!

That's it for me today. Be sure to stop by the Spellbinders' blog and website for their AWESOME sales!!! 

THANKS so much for stopping by!    

2024: March card using Spellbinders' Florals Through the Year collection [card #302-303]

Hello, sweet friends! 
I'm super excited to join Spellbinders and their release of the Florals Through the Year collection--- there are soooooooo many things you can do with this set: 
  • Yearly calendar 
  • Birthday cards
  • Sympathy cards
  • Anniversary cards
  • Thinking of you cards
  • and MORE!!!!
And the great thing about these BetterPress plates is that you can make one layer cards by inking or add dimension by fussy cutting the image out!!! 

Plus--- there's more!! This collection released an easel die that you can use for your yearly calendar... taking photos of your creations... or holding your phone!!! What an awesome release! 

For my first project, I wanted to create something different... sure I could make a calendar or birthday card... but I wanted to make something that I could use for just about anything during the month of March. This card is perfect for encouragement, a quick hello, or thinking of you, and it's perfect for ANYONE! 

I pressed the image with multiple colors on watercolor paper and then added it to a die cut Kraft cardbase. I added some string and sequins to finish this simple design. PERFECT! **supplies listed below
I have two more projects to share!!! Be sure to come back for MORE!!!

That's it for me today. Be sure to stop by the Spellbinders' blog and website for their AWESOME sales!!! 

THANKS so much for stopping by!    

30 October 2024

2024: Disco Snowman with Spellbinders' Shine Bright collection [card #284]

Hello, sweet friends! 

I have had a TON of fun using the NEW Spellbinders' Shine Bright collection, by Carissa Wiley. I've got so many ideas to share!!!! 
This next card was another INSTANT idea that I had when I first glanced at the collection. 3 different sized disco balls... of course, I needed to stack them into a snowman! LOL 😂 

I loooooooooooove how this card turned out! I wasn't sure using white ink would work for the base of the disco balls but it was PERFECT!!!! If you know me, then you know I love mixing and matching my sets. I used a few dies from the Dancin' Snowman set for the snowman's winter gear. TOOOOOO cute:) And if you know me.... then you know that Trav helps me sometimes when creating! I showed him some of the sentiment sets I wanted to use, and he came up with "Shine- It's Tinsel Time"! He's so clever 🤩
I have at so many MORE ideas that I want to try and create using NEW SpellbindersShine Bright collection, by Carissa Wiley. I can't wait to share them all!!!! 

That's it for me today. Be sure to stop by the Spellbinders' blog and website for their AWESOME sales!!! 

THANKS so much for stopping by!    

29 October 2024

2024: Shine Bright Rainbow with Spellbinders' Shine Bright collection [card #283]

Hello, sweet friends! 

I'm back, and I'm thrilled to share a project that I created using the NEW Spellbinders' Shine Bright collection, by Carissa Wiley
I had INSTANT ideas of what I wanted to create using this new collection. After creating a spinner card (click HERE for the details and photos), I knew I wanted to do something with a rainbow. A rainbow of disco balls with a sentiment is the PERFECT encouragement card for a friend!! 
I loooooooooooove how this card turned out! And it was fairly easy to make--- my only advice is to be careful when stenciling each disco ball as you will get smearing or over inking!!! Use masking tape or post*it notes to help with preventing this happening. 

I have at so many MORE ideas that I want to try and create using NEW SpellbindersShine Bright collection, by Carissa Wiley. I can't wait to share them all!!!! 

That's it for me today. Be sure to stop by the Spellbinders' blog and website for their AWESOME sales!!! 

THANKS so much for stopping by!    

27 October 2024

2024: Disco Christmas with Spellbinders' Shine Bright collection [card #282]

Hello, sweet friends! 

It's been a LOOOOOOOOONG time:) 

I'm super excited to share a project that I created using the NEW Spellbinders' Shine Bright collection, by Carissa Wiley
When I was asked to join in the fun, I immediately knew I wanted to make a spinner card. I didn't realize how many of us had that idea- LOL 😂 #greatmindsthinkalike After figuring out I wasn't the only one with this idea, I decided to try and make a spinner card that was different... this got me to thinking about the sentiment "bright" and maybe turning my disco ball into a Christmas card. 
I went with a simple design- diagonal scrap papers, die cut and embossed sentiments, and a few sequins for extra bling! This simple design wasn't so simple though... I struggled with so many elements, such as the glitter on the disco ball running 🤦🏼‍♀️ or the card base getting impressions of my die cutting plates 🤦🏼‍♀️ I also had the glitter paper move on me in the die cutting machine 🤦🏼‍♀️ LOL!!! #usererror While I had lots of issues with this card, I absolutely LOOOOOOOOOOOOOOOOVE how it turned out! 
Be sure to stop by my IG page to see a quick reel/story of how this disco ball spins!!! Click HERE

I have at least five more ideas that I want to try and create--- hopefully, the next projects won't have as many issues! LOL! I cannot wait to share my ideas and creations!!! 

That's it for me today. Be sure to stop by the Spellbinders' blog and website for their AWESOME sales!!! 

THANKS so much for stopping by!    

Be blessed ❤️
Sav


Spellbinders Supplies- Disco Christmas Spinner #282

19 September 2023

2023: Spellbinders Gnome Hugs Release [#83-90]

Hello, sweet friends! 

It's been awhile. Seems like that's been the normal lately. It's been a rough couple of years and really hard to write posts as of February 2023 due to my wrist injury. And then..... I often wonder if anyone even reads my blog posts anymore, esp with social media really taking off. Either way-- I'm happy you are here ❤️

I am beyond excited to share that I was asked AGAIN to create a few special projects for the amazing company Spellbinders!!! Can you believe it!?!? WOW! 

This time I was sent four different die sets and created some super fun cards! All details and products used will be linked at the bottom of this post. 

The first set is the Envelope of Wonder and Autumn of Wonder die sets. I was eyeing these dies since they came out- they are amazing! I decided to make a fun envelope with a pop-up message. It's interactive! 
I created a simple video to show how the message pops up. The key to making the envelope close completely and the message to pop up is an extra score line near the top/the flap of the envelope. I figured that out after making three envelopes 😂

The next card I made uses the Notched Corner Frame dies. This is a classic set that can be used on sooooooooo many card designs! Layered or used individually... you can even layer two and die cut them to create a custom notched corner frame! I enjoyed making this Christmas card using these dies. 
The last few cards were created using the Gnome Hugs die set. I didn't know it came with sentiments so I made my own designs using other Spellbinders foil plates and stamps. I had so much fun making that beach Santa- the boot die was used to make his swim trunks; I just turned the boots/shorts upside down {and the sentiment was supposed to look like it was CENSORED 😂}!! And the NOEL gnomes are so cute! And I looooooooooove the colors of the Merry & Bright gnome!! Let's just say it--- I LOVE LOVE LOVE them all! 
That's it for me today. THANK YOU so much, Yana and Spellbinders, for this amazing opportunity to share my creations with you!

THANKS so much for stopping by!    

Be blessed ❤️
Sav

Facebook: Savannah O'Gwynn
Purchase cards HERE: https://bit.ly/Savannahland2forsale 


Envelope Pop-Up Message Card #83-84
Paper: old 6x6 papers from my stash
Inks: Ranger Distress Oxide inks

Happy Holidays Dog #90:
Paper: S.E.I. Holiday Cheer 12x12, Your Paper Insider box 1 + 2 silver and red metallic papers, The Stamp Market kraft, gravel, black, white, Cotton Candy cardstock

Beach Santa Gnome #89:
Paper: The Stamp Market cardstock
Ink: Ranger Distress Oxide Antique Linen, Brushed Corduroy, Vintage Photo; Imagine Crafts VersaMark; WOW! Embossing Powder Fine White
Accessories: Nuvo Crystal Drops Antique Rose

NOEL Gnome #85:
Paper: The Stamp Market cardstock; Your Paper Insider silver metallic paper

Merry & Bright Gnome #86:
Paper: The Stamp Market Curry, Fresh Pink, Raspberry, Forest cardstock; Recollections gold metallic paper
Ink: Ranger Distress Oxide Vintage Photo; The Stamp Market Curry, Fresh Pink, Raspberry, Forest, Gravel
Accessories: white thread

10 April 2023

2022: Spellbinders Stylish Ovals Collection [cards #24-29]

Hello again, sweet friends! 

I am beyond excited to share that I was asked AGAIN to create a few special projects for the amazing company Spellbinders!!! Can you believe it!?!? WOW! 

**Bonus---there's a great sale going on! Check it out!!! 

You can find the newest collection HERE- Stylish Ovals.  

I posted yesterday about my injury [HERE]. This injury has caused me to put a hold on crafting and working... and life in general. But Yana contacted me a week or so ago and asked me to create some projects using the new SO goodies... and of course I said YES!! I wasn't sure how I would do it since I can't move my wrist and barely can move my fingers. As of February 1, 2023 I had created a total of 23 cards. For 66 days I have been recovering and unable to move. But just in the last three days, I have made FIVE more cards!!!

The bad news is that it took ALL afternoon for a card. 
The good news is that I did it🎉🎉🎉 I can't wait for you to see these beautiful cards. I had soooooo much fun creating each- especially the last two as they reflect my "cardmaking style" the most!! 
**All links for the supplies can be found at the bottom of this post. 

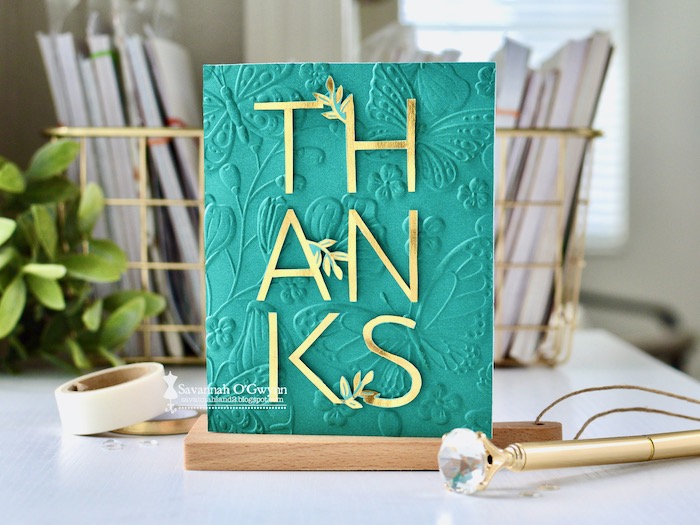
First up, a card using the new 3D Beautiful Butterfly embossing folder. This was my first attempt at crafting again... so I pulled out some EVO papers I had inked up a year ago and embossed it to create the background. After that, it was easy to finish this card. I love it!
Next up is a trio of cards. I had an idea... it didn't work out... so I did two other versions. LOL. 

The idea was to foil the sentiment over the embossed background or before I embossed. I realized after creating the background and embossing that it would be impossible to get the sentiment foiled and flat. So I foiled it on colored cardstock and FUSSY CUT it out--- yes, FUSSY CUT with my injured hand! It took forever and I was in so much pain. When I say my wrist doesn't move... it doesn't! So this task was impossible. That's why you might see lots of mistakes on this card. LOL 🙃
So I tried again by foiling on a transparency sheet. It worked but I messed up cutting the card base... again, my wrist doesn't do well with pressure from the cutting board. So I made that into a birthday card and created ANOTHER base for the foiled transparency. Finally, I loved how that transparency looked and finished the cards. 
These last two are my absolute FAVORITES!!! These cards took me back to my roots of cardmaking- I used to use so much patterned paper!!! I love the layers and the colors and the designs...I love it all😍

This first card used the new Fill My Heart Sentiments stamps(see the gray inked labels?!!--I wanted a soft detail on the labels and those flowers were the perfect touch!!!) and the Stitched Floral Flip Frame dies but I only used the solid die. I thought it looked really cool as an element of interest. 
That's it for me today. My wrist/hand is hurting from typing so much... but it's SOOOOOOOOOOO good to be back😉 I have a long road of recovery ahead of me, but I'm sure I'll be back to share more crafty goodness soon- at least I hope!!

THANKS so much for stopping by!    

Be blessed ❤️
Sav

Facebook: Savannah O'Gwynn
Purchase cards HERE: https://bit.ly/Savannahland2forsale 


Supplies Butterfly Birthday
Paper: ETC Paper EVO synthetic papers; white; vellum
Inks: Ranger Alcohol inks (Purple Twilight, Pistachio, Limeade, Stream); Imagine Crafts VersaMark
Accessories: Spellbinders Beautiful Butterflies 3D embossing folder E3D-055, Frame die KOM-Oct21, glimmer machine, Mini Everyday Sentiments GLP-260; Pink & Main gems; WOW! Embossing Powder Opaque Bright White Super Fine; white thread
Card #24

Supplies Trio
Paper: The Stamp Market Lagoon; transparency; vellum; gold cardstock
Inks: The Stamp Market Lagoon 
Card #25-27

Supplies TOY Sympathy
Paper: Project Life Becky Higgins Polka Dot Party ED.; white
Inks: The Stamp Market No Line/Gravel; Imagine Crafts VersaMark; WOW! Embossing Powder Metallic Gold Rich Super Fine
Stamps/dies: Spellbinders Fill My Heart Sentiments STP-183, Stitched Floral Flip Frame S4-1267; Hug Snug Snow White ribbon; Ranger mini stapler 
Accessories: The Stamp Market Confetti 
Card #28

Supplies Special Day
Paper: The Stamp Market Color Crush Solids 6x6, Miss Modern 6x6, Bloom Street 6x6
Inks: The Stamp Market Peach; Imagine Crafts VersaMark; WOW! Embossing Powder Opaque Bright White Super Fine
Accessories: white/black twine; The Stamp Market large gold paperclip
Card #29

19 September 2022

2022: Spellbinders Boo Dance Collection [cards #111-114]

Hello again, sweet friends! 

I am beyond excited to share that I was asked AGAIN to create a few special projects for the amazing company Spellbinders!!! Can you believe it!?!? WOW! 

These cards were shared last month on social media... I'm a bit late sharing here:) 

#SAVfact: I do not like Halloween. Never have. I don't decorate for the holiday; I don't buy candy to give out; I don't make Halloween cards... until this year! And to be really honest, I LOOOOOOOOOOOOVE the cards I created! These creations made me step out of my comfort zone in many ways:
1. I had to make projects for a holiday I normally don't create for.
2. I used distress inks to ink paper/add dimension and detail.
3. I used Copic markers---ok, I used ONE copic marker for each card... but still! I don't normally add detail with markers! 
4. I pulled out and used papers that I love (I know that doesn't sound like I'm out of my comfort zone.... well I don't like using papers I love because I'm a hoarder🙃).

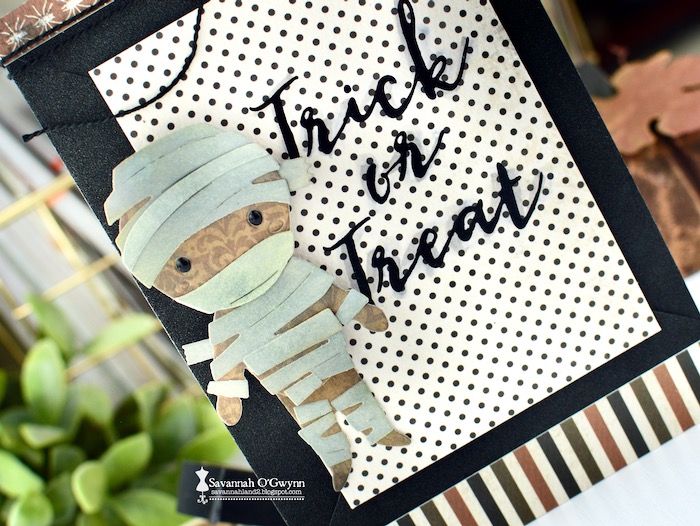
This little mummy's legs MOVE!!! He dances on the front of the card- sooooo fun! 
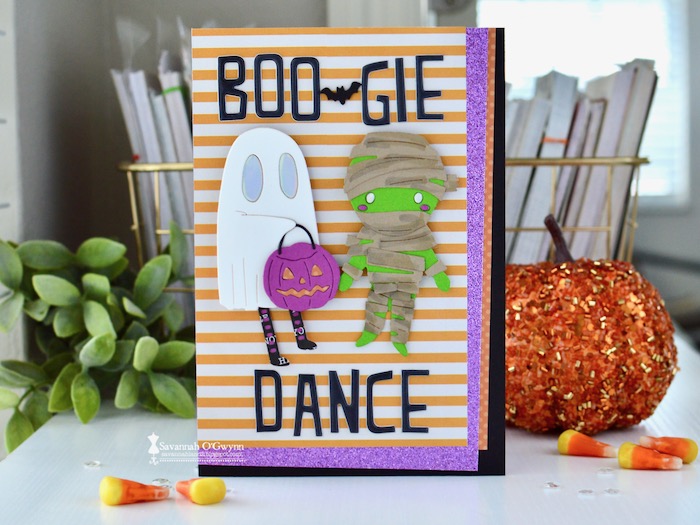
This ghost's legs also MOVE! That's why I put the sentiment "boo-gie dance" on the front! LOL
How about a bit of GLIMMER!!! Iridescent and silver! 
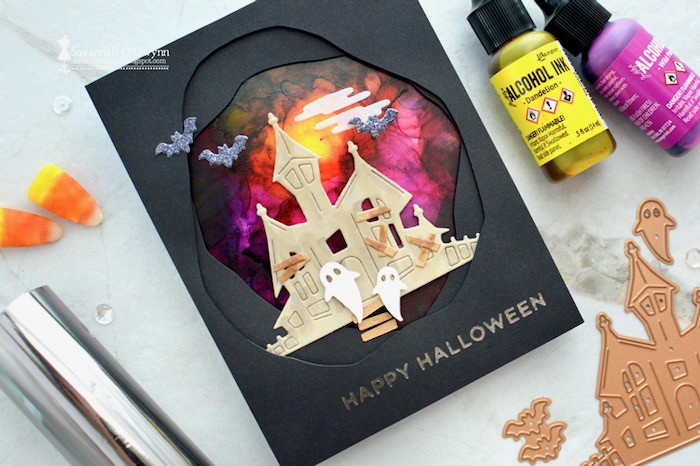
And finally... my FAVORITE card! An alcohol inked background with a 3D diorama effect for the front! Soooooooooo spooky! 
I actually have at least ten more designs that I would like to make before this Halloween... but I'm not sure I will get them done! I will keep you posted:) 

Be sure to check out the new Spellbinders collection and order your  Halloween stamps/dies/foil plates before it's too late!! 

I'll be back to share MORE soon! THANKS so much for stopping by!    

Be blessed ❤️
Sav